|
|
 |
|
Home > Help
files >>
Dreamweaver libraries
Dreamweaver libraries and templates
Most well-designed websites have areas that are repeated
from page to page. These would include header areas,
navigation bars, information boxes, footers, etc. Occasionally,
changes need to be made in these areas. There are wonderfully
easy-to-use components in Dreamweaver to make those
changes appear on multiple pages when the change is
made at one location. Dreamweaver has two such components,
Libraries and Templates.
|
|
|
|
Dreamweaver Libraries
The easiest way to go about creating a Library Item
is by placing content on a web page as you wish it to
appear, then converting it to a Library Item. Keep in
mind that using tables
to control your layout is the only cross-compatible
method.
1. Design the content on a web page you wish to convert
to a Library Item.
|
 |
|
|
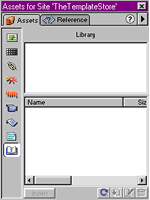
2. Go to Window > Assets. Click on the Library icon
on the left side of the Assets window (library view
1). The icon looks like an open book.
3. Select the area you wish to convert to a Library
Item.
4. Click on the black arrow at the top of the Assets
window and choose New Library Item.
5. Give it an appropriate file name.
|
 File names should contain lower case letters,
numbers, hyphens, and/or underscores. They should
not contain spaces.
cat.htm, Cat.htm, and CAT.htm are not the same
file. Writing file names in all lower case letters
will help keep things in order.
|
|

library view 1 |
|
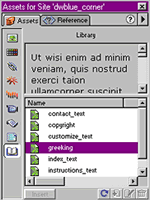
6. When you wish to add this Library Item to another
web page, select the appropriate Library Item from the
list in the Assets window then simply drag from the
gray area at the top of it and drop into the web page.
See library view 2.
Modifying a Library Item
When you wish to make a change in a Library Item,
open the Library Item by double clicking on the file
name in the Assets window, make the changes on the page,
and save. The changes will appear wherever you have
inserted the Library Item.
Dreamweaver Templates
Some of my peers consider Dreamweaver
Templates to be one of Dreamweaver's greatest assets.
Stated simplistically,
Dreamweaver Templates are really big Library Items.
Instead of occupying a small part of a page, Templates
control a large portion of a page, all areas that are
to be kept consistent throughout most of a website.
Areas within the page are made editable so new content
can be inserted from page to page. All of our Template
Store templates designed for Dreamweaver, available
for purchase on this site, are based on Dreamweaver
Templates.
1. Build a web page as you normally would, including
graphics, text, css, navigation, etc.
|

library view 2 |
|
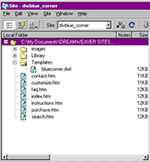
2. When it is complete, File > Save as Template.
Give the template a simple name. It will reside in its
own folder and have a .dwt extension. See template view
1.
If you saved the page you originally designed as an
.htm or .html page, delete that page from your web.
You will replace it later.
3. There will be certain areas on the page you will
want to be able to change from page to page, such as
the body content. Select all the content in the body
area, then go to Modify > Templates > New Editable
Region.
4. Give the region a simple descriptive name such as
"body."
5. Repeat steps 3 and 4 for each region on the page
you want to make editable.
The HTML head section of your web page also becomes
part of the template. Unless you modify that area in
the HTML, you may have trouble adding meta tag keywords
and descriptions, head sections of JavaScript, etc.
|

click to enlarge
template view 1
|
|
6. Look at the head section of the HTML of your page.
Notice the title of the page is an editable region (template
view 2). You can manually cut the entire BeginEditable
line of code, and paste it immediately below the <head>
tag. You can also cut the entire EndEditable line of
code, and paste it just above the </head> tag.
|
 Control + x = Cut
 Control + c = Copy
 Control + v = Paste
 Control + s = Save
|
7. When you have finished assigning
editable regions, save the Template.
Making and Modifying a Page from a Template
1. File > New From Template
2. File > Save. Assign the page an appropriate file
name. See the file name hint above.
3. Give the page a title, remembering to use keywords,
if possible.
4. Select the contents of an editable region and replace
it with content appropo for that page. Save. Continue
for each editable region.
Modifying a Template
When you wish to make a change to a template, open
the template page by double clicking on its file name
in the Site window. Make changes. Save. All modifications
will appear throughout the site on pages created from
the template. Note: Universal changes will not occur
if made in editable regions.
|
|
 |


New section with 100% CSS based XHTML valid Frontpage templates.
New section containing templates Microsoft's new Expression Web
program.
New section with 100% CSS based XHTML valid Dreamweaver templates.
New section containing templates Microsoft's new Expression Web
program.
We now have a selection of website templates with full PSD source
files.
New range of 100% CSS layouts and XHTML compatible.
 read more... read more...

Check
out our reseller program and earn 20% commission on all templates
sold through your site - that's over $30 per sale for
our ecommerce plus templates.
 read
more... read
more...


|

